Calgary insurance adjusters see thousands of storm damage claims every season. The ones that move through the process quickly and fairly are backed by strong documentation. The ones that get underpaid or disputed often have a documentation problem — vague photos, missing coverage, no timestamp evidence.
Here’s the documentation process done right.
Step 1: Wait Until It’s Safe
Do not go outside until the storm has completely passed and lightning risk has cleared. Hail can continue falling intermittently after the main storm cell passes. When the weather is clearly done:
- Look for standing water or debris on walkways before stepping out
- Wear sturdy closed-toe shoes — hail ice on pavement is slippery
- Avoid the roof entirely — wait at least 24 hours before any roof inspection
Step 2: Do a Full Property Walkthrough First
Before you start photographing, walk your entire property and make a mental inventory of everything that might show damage. You want to document everything in a single, comprehensive session rather than coming back to add items later. Look at:
- All four elevations of the siding
- Gutters and downspouts (all of them)
- Window screens on all windows
- Exterior doors (especially wooden doors or painted metal)
- Any outbuildings or detached garages
- Fence (wood fences show hail impact clearly)
- AC condensers and heat pump units
- Vehicles (document separately for auto insurance but note them)
- Landscaping (stripped leaves, broken branches corroborate storm intensity)
- Roof (from ground level — no climbing required)
Step 3: The Documentation Sequence
Wide-Angle Elevation Shots
Start with full-elevation photos of each side of the house — front, rear, left side, right side. These establish the overall condition and orient your close-up photos. For a two-storey home, take:
- Ground-level shots of each elevation
- Stepped-back shots from the street/back yard to capture the full face
Mid-Range Panel Shots
Get 3–5 metre distance shots of each damaged area. These show the density of impact pattern across a section of siding — critical for establishing whether damage is scattered (minor) or pervasive.
Close-Up Impact Documentation
For each distinct damage type, get close-up photos that show:
- The specific failure mode (crack, dent, puncture, chip)
- A reference object for scale — a coin, a ruler, your hand
- Multiple angles if the damage has depth
Photography tip: Turn off your phone’s flash and photograph in the shade or on an overcast day. Overcast light shows surface texture (and impact marks) far better than harsh direct sunlight, which can wash out subtle damage.
Collateral Damage Documentation
These items corroborate the storm’s intensity and severity:
- Gutters and downspouts: Photograph any denting — round dents from hail are unmistakable
- Window screens: Punctured or torn screens are powerful evidence of hail size
- AC condenser fins: Bent or dented fins are consistent damage from hail
- Exterior light fixtures: Cracked covers, bent housings
- Wood fences or deck boards: Hail dings on wood surfaces
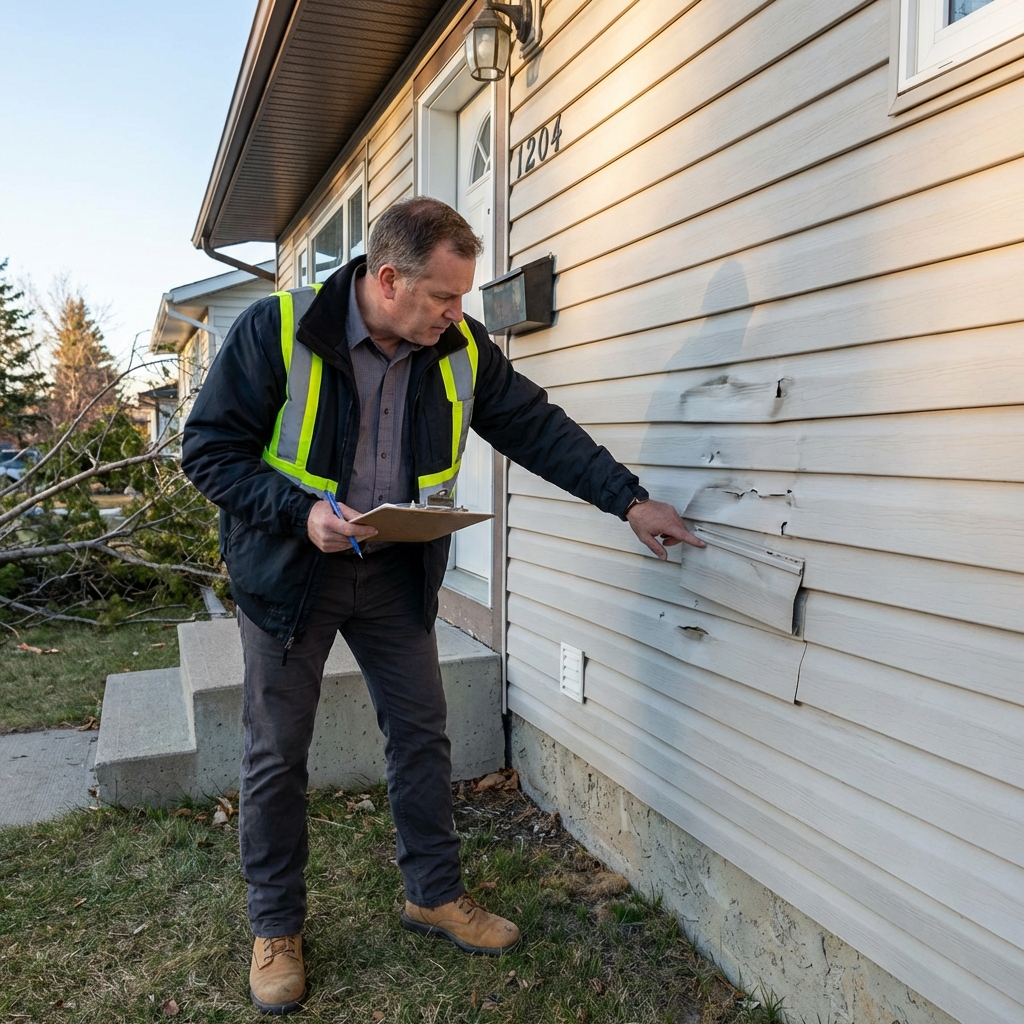
An adjuster who sees dented gutters, torn screens, and damaged condenser fins alongside siding damage has no grounds to question whether a storm occurred.
Step 4: Video Walkthrough
After still photos, do a continuous video walkthrough of the entire exterior. Video captures damage patterns and context that static photos sometimes miss. Keep it slow and steady — talking out loud as you walk (“this is the south-facing wall, you can see the impact pattern across the entire upper half…”) creates a useful narrative record.
Step 5: Backup and Timestamping
Immediately after documentation:
- Back up to cloud storage (iCloud, Google Photos, or Dropbox) before anything else — this preserves independent timestamps
- Note the date, time, and storm event in a text document alongside the photos
- Do not edit or filter any photos — use originals only; any post-processing of evidence photos can be questioned
Step 6: What to Give Your Adjuster
When the adjuster visits, provide:
- Printed or digital copies of all photos, organized by location (North wall, South wall, gutters, etc.)
- Your video walkthrough on your phone
- Any written notes from your initial assessment
- Any communications with neighbors or news reports confirming the storm event date
A well-organized documentation package shows the adjuster you’re serious and makes their job easier — which typically leads to a more thorough inspection.
If You Think Damage Was Missed in the Adjuster’s Assessment
Adjusters are humans working under volume pressure — especially after major Calgary hail events. If you believe your inspection missed significant damage:
- Contact your broker and request a supplemental inspection
- Have a contractor provide an independent written assessment
- Cite specific items and locations that weren’t included in the scope
- If the insurer is unresponsive, consider a public adjuster (they work on a percentage of the additional settlement they recover for you)
King’s Land Siding accompanies homeowners to adjuster inspections at no charge and can provide independent written damage assessments. Call (403) 555-0190 or reach out online.